n addition to choosing the type of monitor on which the content will be transmitted, it is important to determine which kind of stand/bracket you will use to install them in the chosen location. Will they be mounted on a floor stand? Hanging on the wall like a painting? Or fixed to the ceiling? It all depends on the type of bracket you decide to buy.
How do you choose the right one? We’ll explain it to you.
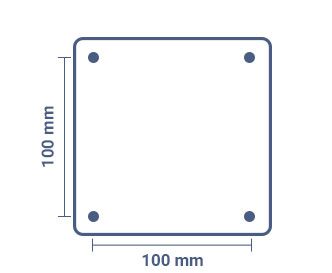
VESA standard and TV weight
In order to proceed with the purchase of a bracket, you need to know two fundamental pieces of information.
The first is the weight of the monitor. Each support in fact has a maximum kg capacity beyond which it cannot go. There is a risk of dropping and damaging the screen.
The second (but no less important) is the VESA standard.
Wall, floor or ceiling?
Once you understand what the weight and VESA standard of the monitor are, you can move on to deciding the type of support. There are 3 main categories.
On the wall: this is the simplest type of support. It allows the monitor to be hung on the wall as if it were a painting and is aligned with the public’s line of sight. However, it often requires additional locking systems to protect the player from theft or tampering since it is behind the screen but within reach.
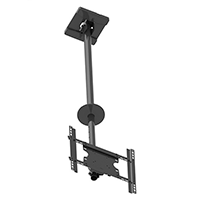
Ceiling-mounted: usually, these are metal harnesses on which the monitor is mounted. These are then fixed on poles which in turn will be attached to the ceiling. If you opt for this solution, make sure that the pole is adjustable to varying heights and that you can change the angle of the harness to ensure the best viewing experience for your audience.
Floor: these are simple stands to which the monitor is attached. If you decide to opt for this support, make sure that the pole you choose allows you to change the tilt, rotation of the screen and height of the pole. Remember, flexibility is important to give your customers optimal visibility.
Push&Pull: they are designed to allow you to zoom in and out of the screen with a simple push on the monitor and are mainly used for creating video wall displays. Therefore, in case of maintenance, the technician can also easily access the screens that are located in the centre of the video wall. Push & pulls can also be used for installations in niches where a fixed wall bracket would not allow access to the back of the monitor.
Flag-style: they are ideal for digital signage installations in shop windows when you have a side wall to attach them to. In fact, they are equipped with a sliding and adjustable arm that allows you to position the monitor in the window without having to use floor supports. These brackets are also perfect for niches. Thanks to their movable part, you can change the position of the screen by 90° or 180° in order to easily reach its back in case of maintenance.
Floor-to-ceiling: ideal for installations in niches or shop windows, they are composed of two parts: one that is fixed to the ceiling and floor and one to which the monitor is fixed. The part that will be fixed on the ground and above can be a steel tube or a set of cables (always steel) that are thin and discreet. The one to which the monitors will be attached, on the other hand, is simply composed of fixed brackets that in turn are connected to the pipes or cables. Perfect for installations where we have no masonry elements to which we can attach wall brackets, floor-to-ceiling can also be used to create showcase video walls when there are no walls to install push & pull brackets.
How many joints do I need?
In addition to deciding the type of bracket, you also need to work out how many joints you need to offer your users an optimal viewing experience.
On what does the choice depend? Where the monitor will be installed. If it is a spot where the screen is clearly visible from any angle without the need to tilt it, then a bracket without joints will be perfect. If instead the monitor is installed in a point that hinders the viewing of the content, it is better to opt for a 1 joint or full-motion. You can adjust the inclination, angle or distance from the wall.
Fixed: this type of bracket does not provide the option to change either the inclination or the angle. Choose this type of bracket if the spot where you will be installing the monitor guarantees a clear view of the content without having to change the position of the screen.
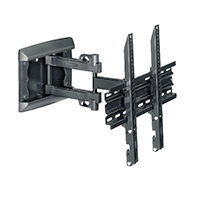
1-joint/2-joints: 1-joint brackets can be tilted and rotated from a single moving point. On the other hand, those with 2 joints are equipped with two different moving points from which it is possible to change the rotation and the inclination of the screen. This is the perfect solution to guarantee your audience a clear view of your content, even if the installation will be in a location that hinders visibility.
Tilting: le staffe inclinabili consentono di modificare solo l’inclinazione del monitor. È la scelta giusta se il punto in cui installerai il monitor è particolarmente alto e per agevolare la visione dei contenuti è necessario inclinare lo schermo verso il basso.
Full-motion: this type of bracket offers maximum flexibility. It allows you to move the monitor closer and further away from the wall, rotate it to the left and right or change its tilt. In this way, you will be sure to offer your audience optimal visibility wherever it will be installed.
Now you know everything you need to know about brackets. Find the right one for you in the Store.